


So - you have some org-specific information you want to track in LeanIX and there aren’t any comparable fields/attributes offered out-of-the-box. Have no fear - we believe that each org has its differences and should be able to represent those accordingly within our meta model.
For those with Admin access to the workspace, you can navigate to our Meta Model Configuration (each fact sheet type has its own configuration). I’d like to share some helpful tips/tricks when configuring your own fields/attributes, relations, and sections/sub-sections within our Meta Model Configuration.
First, it is important to note that when creating anything new that doesn’t exist ootb, you should really be keeping your end goal in mind. Do you want to create a field that you can report on? Do you want to create sections/sub-sections that are easy for users to consume? Do you want to create a new relation to denote a linkage between two fact sheet types?
Once you’ve pondered a bit, you decide to move forward with some changes that will benefit your organization. Let’s talk through a few scenarios.
Scenario 1: Creating a field to report on.
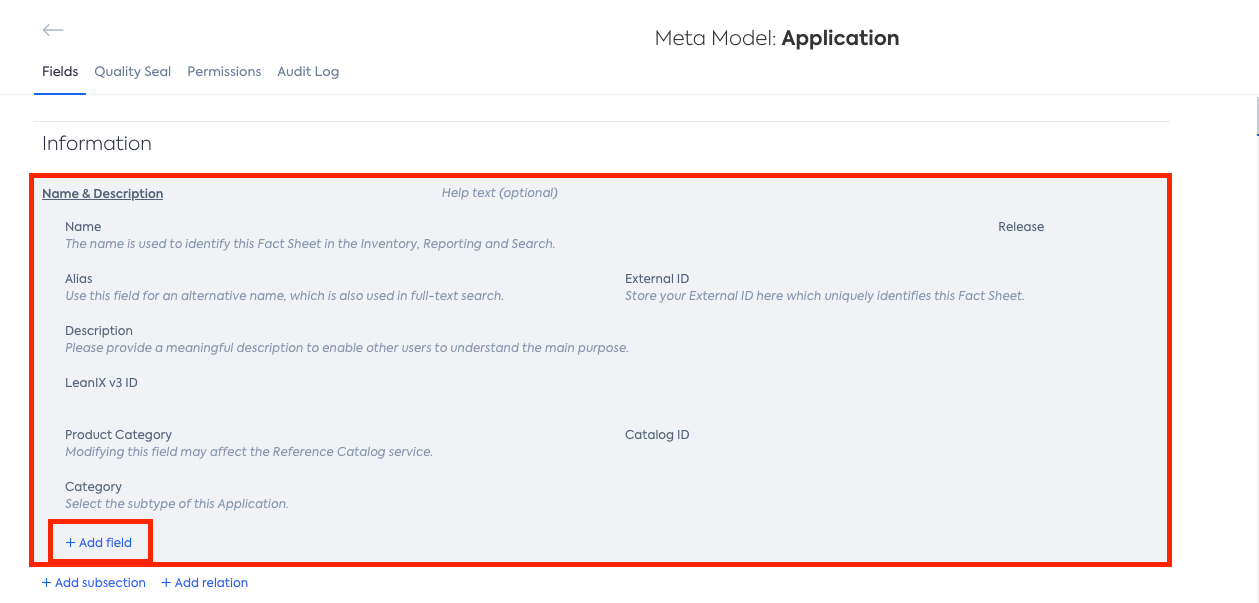
You’ve decided that you’d like to create a field of your own and ultimately apply a reporting View (color coding applied by selecting a field or tag in our “Views” drop-down window in reporting). You want the field to be applied to your Application fact sheets, so you open your Application Meta Model Configuration.
The first step you should take is deciding which section and sub-section will be home for your new field. You click on that given sub-section, and then on the blue “Add Field” button that appears:
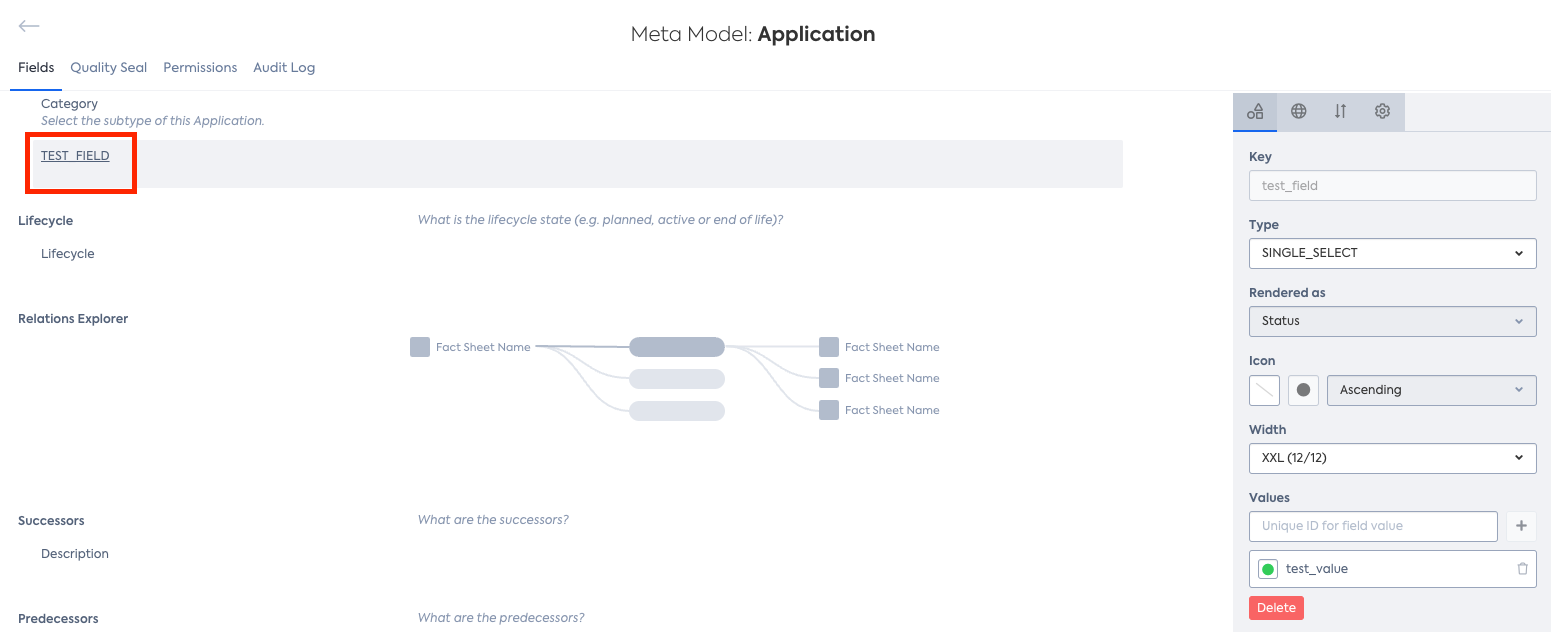
You are prompted to enter a key. Keys are a back-end mechanism that are leveraged in our data model - you won’t see the key on your fact sheet. Keys cannot be changed once they are set, and can you can only define letters A through Z (upper and lower case) and underscores _ in the key name - you cannot use spaces or special characters.
You’ve entered your key, and you are now asked to select the Type of field you would like to create. The default is STRING, which will allow users to enter a string of text in the field. Other options include DOUBLE, INTEGER, MULTIPLE_SELECT, and SINGLE_SELECT.
INTEGER and DOUBLE will allow users to enter numeric values. MULTIPLE_SELECT will give a user the ability to select/apply multiple values for the given field. SINGLE_SELECT will only allow the user to select one specific value for the given field.
A very important tip - If your end goal is to apply a reporting view with this new field, you must choose the SINGLE_SELECT field type. No other type will allow for you to apply a reporting view except for this option!! Note that the same holds true for tags - only SINGLE_SELECT tags will be available in reporting views.
Once you’ve chosen the SINGLE_SELECT type, you can then enter Value keys accordingly, clicking the + button after each key you enter. You can also click on the colored circles to the left of each added value key to change the color coding that will ultimately reflect in your reporting view.

Then, you can click “Create”.
You might immediately notice that your field looks, well… ugly.
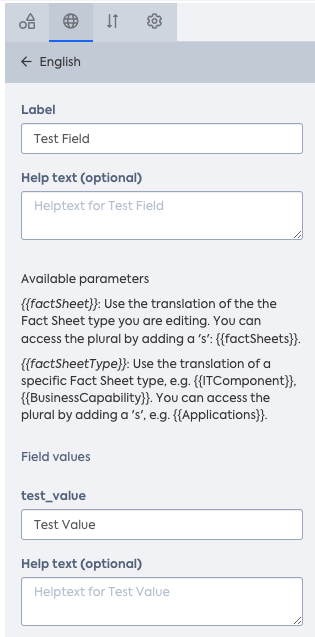
The next step is to beautify - we will need to give this field a Label. Click the globe icon on the configuration pane, select your desired language, and give each field and value a proper label. Here, you can add spaces, characters, etc.
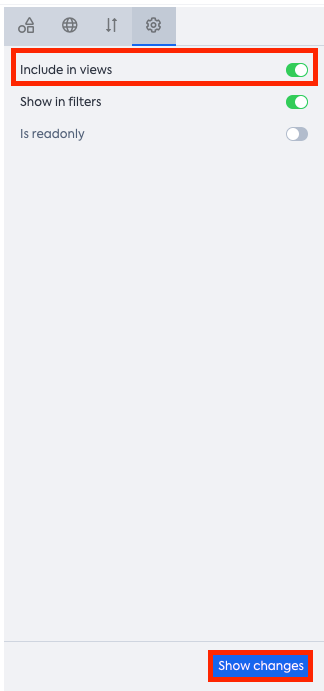
There is one last trick of importance here before we save our changes. Click on the gear icon in the configuration pane and ensure that the Include in Views toggle is switched ON. This toggle is not switched on by default, and you will only see your SINGLE_SELECT field present for selection in the reporting Views drop-down if you do switch this on! The Show in Filters toggle is switched on by default, however.
Now, you can click the “Show Changes” button, and Apply.
As a result, you will see the field present both on your Application fact sheets, and in the Views drop-down in reporting.
Scenario 2: Creating a new section or sub-section on your fact sheets to keep organized.
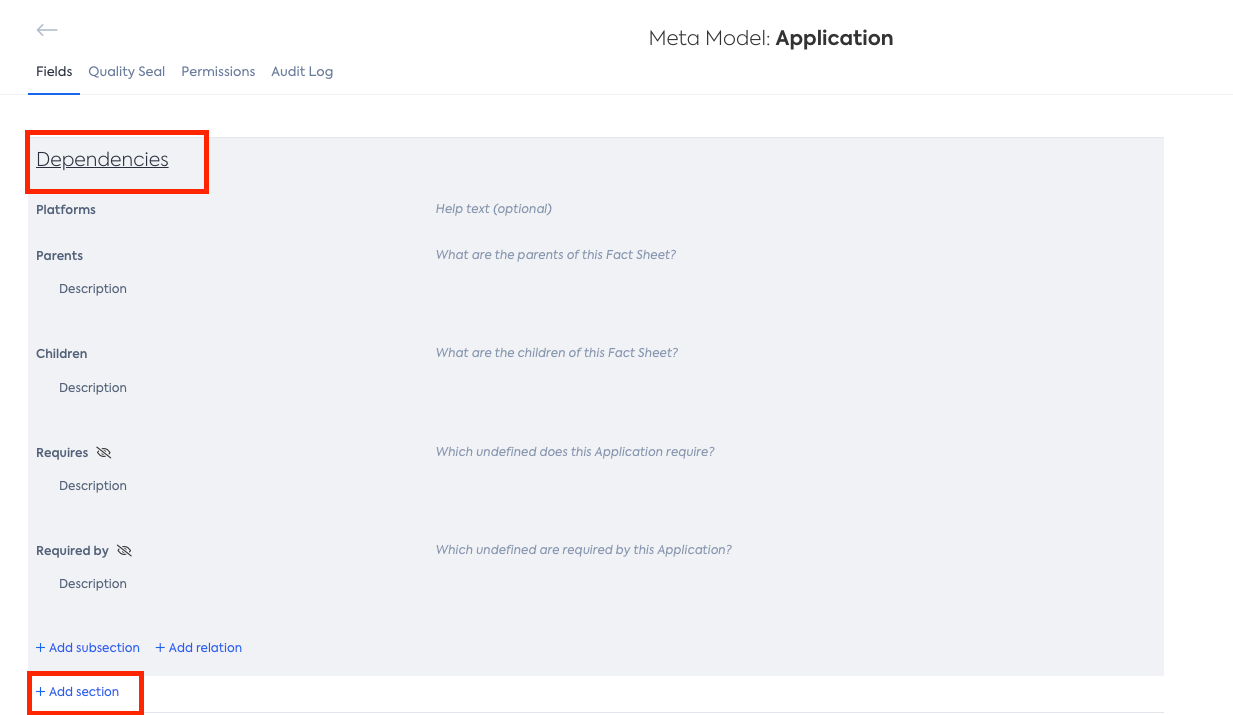
This one is really quite simple, as long as you know where to click. If you want to create a larger section, which will then have its own sub-sections, fields, and relations, you must click on an existing section, first. In the below image, you can see that we’ve clicked on the Dependencies section, and then we have the “Add Section” button available to us.
Now, I can add my Section key and label (same process as detailed in Scenario 1).
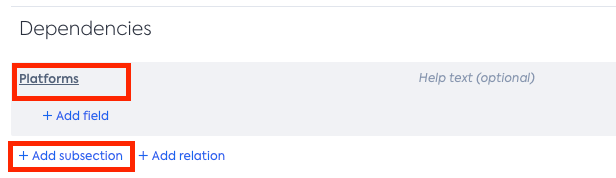
If I desire to add a sub-section, I can click on either a larger section as shown above, or another sub-section. I can then add a label for this sub-section, as well.
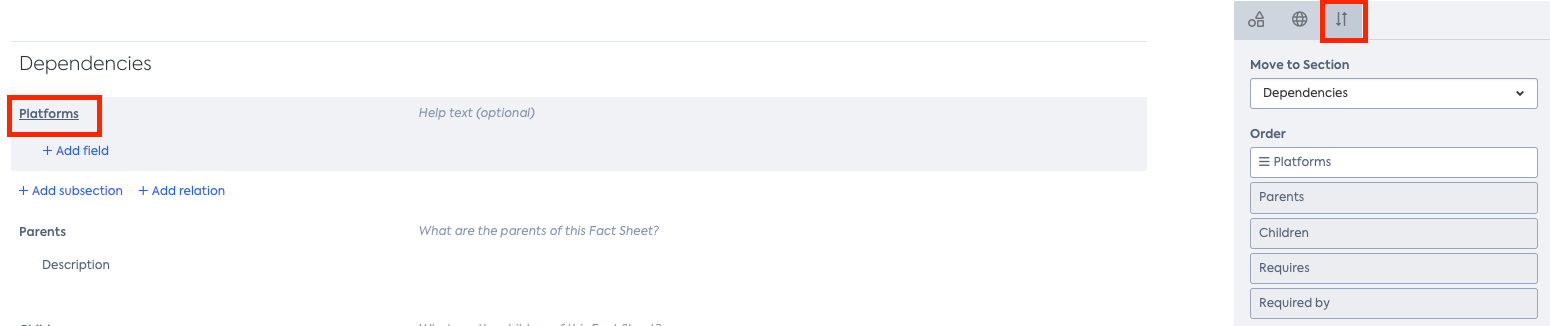
A helpful tip is that you are able to re-order all of your sections and subsections if you’d like - just select the section or sub-section you’d like to re-order, and click the double arrow button on the configuration pane. Then, click and drag accordingly.
Don’t forget to click Show Changes and Apply.
Scenario 3: Creating a relation that does not exist out-of-the-box.
There are 2 things we ask to keep in mind when considering the creation of a new relation. Let’s use a rather common example - out-of-the-box, LeanIX does not offer a relation between Business Capabilities and Organizations (aka User Groups). Some customers want to show a relation between the two. We ask that first, you discuss the use case with your CSM or Onboarding Manager. If you decide it is valid and you want to proceed, please keep in mind that this new relation must be viewed as an additional relation, not meant to replace the relations that we do offer out-of-the box. For this specific example, we would ask that you still leverage and maintain the ootb relations between Applications and Business Capabilities, and also between Applications and Organizations/User Groups. The new Business Capability to Organization/User Groups relation will be an additional relation to maintain, and you will need to educate your internal users about the new relation and maintenance.
If you have an understanding of these warnings and would like to move forward, you can create the relation in your Meta Model Configuration.
The relation will be bi-directional, so you can create it either from the Business Capability meta model config, or the Organization/User Group config - either will do (you won’t have to create the relation twice).
Select the sub-section you’d like for the relation to exist in, and click the “Add Relation” button. Choose your target fact sheet type. If you are creating the relation in the Business Capability meta model config, select Organization/User Group here. If you are operating in the Organization/User Group meta model config, select Business Capability.
Next, choose your multiplicity. The options here are straightforward, but note that once you make your selection, this cannot be changed. If you decide later on that you would like to change this, you will need to delete your relation and create another new one.
Finally, select the section you’d like for the relation to show in within the target fact sheet type. Below, you can see we chose for the relation to be available in the Dependencies section of the Organization fact sheet.
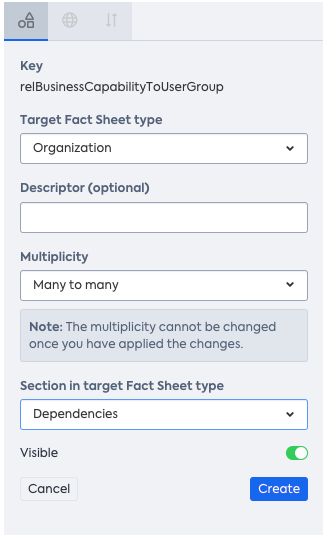
You can then click “Create”. You do not need to change the Label on the relation as you would need to with fields and sections/sub-sections.
And there you have it - a new relation is established!
Please consult your trusted LeanIX team before making extensive changes to your meta model - we are always happy to chat and guide you to success. The above steps will also help you get there. Happy configuring!